Pages

Friday, June 29, 2012

Scrap That! July Kit Reveal and Blog Hop


Welcome to the ScrapThat! July Kit Reveal and Blog Hop!
ScrapThat! is delighted to introduce our July kit featuring the beautiful Organic Collection by Fabscraps!!
This month we have a special treat for you. Mark your calendars for July 6th - July 8th.
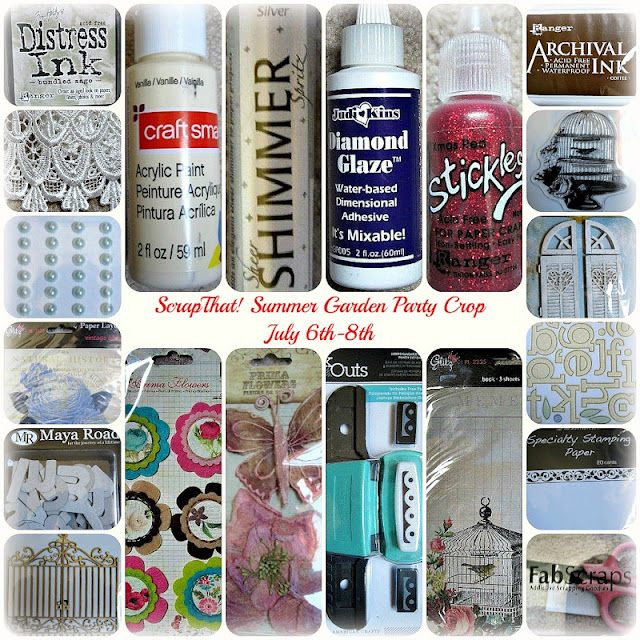
ScrapThat!'s Design Team will be hosting our
Crop will include: challenges, games, prizes, and a live chat session!!
Hope to see you join us for a weekend of fun!

Without further ado, we are pleased to bring you our July Kit...
"Summer In My Garden"
This Kit is chock full of yummy goodies such as Fabscrap's Organic Collection papers, lace, pearls, chipboard, Ingvild Bolme Ink, an array of flowers and much more!!!


Main Kit $39.99
 1 sheet each
Organic Herbs
Organic Herbs Two
Organic Tree
Organic Garden
Organic Kitchen
Organic Lace
Organic Strawberries
Organic Script
Bazzil Cardstock: Tan, Green, Purple
 FabScraps Chipboard Word – Organic
2 wooden clothes pins
1 Melissa Francis- pearls
1 recipe card
4 green picket fence posts
4 2” craft sticks
10 IAMROSES – Cherry Blossom flowers - white
4 leaves
1 2” piece of burlap
1 Ingvild Bolme Chalk Ink– Old Road
3 yrds white cotton, lace trim
1 pkg ZVA includes- 1 blue & white flower and 1 two-tone green flower
1 EK Success, alphabet sheet – Green Chocolate
 NOTE: The Main Kit cost for non-members is $44.99

Embellishment Add-On $14.99

1 pkg, Prima, 3 resin window frames
1 pkg, Prima, 2 crystal palace vines
1 pkg, Petaloo, 6 wild roses
 NOTE: The Embellishment Add-On cost for non-members is $17.99

Flower Add On $12.99
(only 12 of these kits are available each month and sold on a first come, first serve basis)
1 pkg, Pink Paislee, 2 muslin flowers

1 pkg, Prima. 6 primer flowers  

1 Pkg, Prima, 2 Sun Kiss vines

Paper Add On $9.99
 1 sheet each
Organic Herbs
Organic Herbs Two
Organic Tree
Organic Garden
Organic Kitchen
Organic Lace
Organic Strawberries
Organic Script
Bazzil Cardstock – 1 sheet each: Tan, Green, Purple
NOTE: The Paper Add-On cost for non-members is $12.99
We are currently accepting new Kit Club Members.
For more info,  please email friends@scrapthat.ca


Please Join Our July Sketch Challenge HERE
Everyone is welcome to participate, all entries due by July 15th.

My take on the kit contents.
Visit me next week for more details!


a recipe album

 a wedding card

a layout


Our blog hop features 9 fantastic blogs.
To qualify for this month's Blog Hop prize, you must complete the following:

1. Visit each blog and comment on each blog listed in the hop order. 
You can expect see lots of July kit inspiration along the way from our designers! 
2. Each designer's blog hop post will provide a word for a secret sentence. 
Collect these words along the way and follow the directions provided 
in ScrapThat!'s forum when you are finished with the hop.
3. New followers are appreciated. Make sure you LIKE us on our Facebook Page!
4. Post the ScrapThat! blinkie on your blog.
5. The last stop on our Blog Hop is our Forum, follow the link provided and complete the remainder of the Blog Hop instructions.
Hop ends July 1st, 10 pm CDT.
Prize must be claimed within 3 days. 
Winner will be announced on ScrapThat!'s blog Tuesday, July 3.
If left unclaimed, a NEW winner will be chosen!
Please Note: For anything larger than an envelope, winner will be responsible for the cost of shipping.

SECRET WORD: SUMMER

Should you lose your way, come back here for the blog hop sequence.

Wednesday, June 27, 2012

Scrap That! July Kit Sneak Peeks


a note *Heartfelt Creations*


 Inspiration for this tag began with "Be Happy" by Mistra. I'm kinda clumsy when it comes to tags but Mistra's work was a great starting place! And LOOK no patterned papers! I use Kraft and plain, white cardstock with all that stamping.

I stamped this twice, colored, and fussy cut for dimension. The extra stamping is for that largest flower.

I love Prismacolor pencils. I didn't do any blending here. 
Used blue chalk and a black, Micron pen to accent.

See that subtle pink design on the Labels 4 die? That is stamped with Versamark 
and topped with pink chalk.

This Labels 4 die is ink with pink and brown Distress Inks. I used some circle punches to create a reinforced spot for twine.


SUPPLIES:
HCPC 3396 Bella Rose Lattice Background PreCut Set
HCPC 3477 Bird Haven PreCut Set
HCPC 3478 Twining Roses PreCut Set
HCPC 3475 Special Delivery PreCut Set
HCPC 3476 Mailbox Surprise PreCut Set
HCD 702 Decorative Butterfly Border Die
HCD 723 Garden Romance Die
393386 Spellbinders Labels 4
Prismacolor Pencil Set 120 pc.


OTHER:
Distress Ink. Archival black ink. Ingvild Bolme chalk ink. Versamark embossing ink.  Tim Holtz Crackle Paint. Pebbles chalk. Micron pen. Twine. Fiskars circle punch. Making Memories hole punch. Cuttlebug. Foam adhesive. Smooth, white cardstock. Kraft. Bristol paper. Fiskars Crimper.


INSTRUCTIONS:
1. With Archival black ink, stamp "A Note For You", the garden of flowers, and the flourish of flowers. Stamp the right flourish of flowers two times. Trim away "a note" from "for you." Ink the edges of the small sentiment with distress ink. Set aside.
2. Color and chalk the garden of flowers. Trim and outline with a Micron pen.
3. Color the flourish of flowers. Fussy cut. Trim away largest flower from second stamped image and layer on the first with foam adhesive.
4. Stamp the birdhouse with brown Distress Ink and die cut. Set aside.
5. Cut the largest Labels 4 die from smooth, white cardstock. Using the die as a template, ink the edges with pink and brown distress inks. Use Versamark ink to stamp a flourish of flowers, sponge on pink chalk for subtle effect. Punch a small circle from Kraft paper and adhere to far left. Punch a smaller hole through the middle of the Kraft piece. Accent with twine.
6. Cut at 4.25 x 3.25 inch piece of smooth, white cardstock. Stamp the Bella Rose Lattice with Ingvild Bolme chalk ink. Heat set. Ink the edges.
7. Use pink cardstock to die cut the border piece from Decorative Butterfly Border Die. Cut apart for two borders. Ink the edges.
8. Cut a 1 inch strip from Kraft cardstock. Run it through the Fiskars Crimper. Accent with Crackle Paint. Ink the edges. Layer one of the pink, decorative border on top.
9. Assemble all pieces as shown.

Monday, June 25, 2012

Love a good online crop? 
Mark your calendar for July 6-8 for a scrappin' good time!
Check out the sneaks of the RAKs below for online games and challenges!


Saturday, June 23, 2012

Tea Party


 Jenifer was having a hard time finding her mojo so we challenged each other to a Sketch Dual. She had to pick a sketch for me and I had to pick a sketch for her. She chose this sketch from the Kaisercraft blog. I reduced the center and anchored in the lower right. I've been feeling the need to use my old, favorite negative space design element lately. I also ended up using a third photo.

I won Farm Fresh by October Afternoon from Archiver's on National Scrapbooking Day. When I first saw it, I thought I would never use it. However, it spoke to me when I was browsing my digital inventory for paper inspiration.

This little sticker banner is from A Walk In the Park by Echo Park.

Bits of random, true to my style. The tree is from A Walk In the Park by Echo Park. That is my little boy with the ridiculous spy goggles on his head.

This clock is from Happy Days by Echo Park. I thought it was great for "Tea Time." The star is a piece from Jenifer's stash, she RAK'd it to me.

These sticker letters are from Little Boy by Echo Park. I've been in the habit 
of not pressing my sticker letters flat lately.

"Tea Party" is from my handy Dymo labeler. Love that thing!

Jenifer and I were fast online friends. We love to waste time chatting online and thinking up ways to stir up trouble. We talk about our current projects, endeavors, and our personal lives. Maybe one of these days, we'll be lucky enough to spend a weekend together shopping, scrapping, and drinking!

Thanks for stopping by!


Wednesday, June 20, 2012

little bird told me *Scrap That*- Video Tutorial

I'm going to admit that this pink card totally stumped me when I first saw it in the kit. Then, I thought...

I need a card for Kacy. 
(my childhood friend that had a baby earlier this year)
She took some adorable pictures... maybe a mini album.
And I want to include a note. And maybe a gift card?

So, this project became a card, a gift, a keepsake, and a mini album all in one!

The top section with the notch cut (from a circle punch) has a pull out card tag thingy. The Webster's Pages paper in this kit had some great paper with lines! Perfect for tags and journaling.

 I did get permission from my dear childhood friend Kacy Estep to use photos 
that she had posted on Facebook.

I cut the sentiment from the manufacturer strip.

A few more pieces from the kit that ended up on the front of the project.

This lace is GORGEOUS but it was too large for the pink card. I cut off the top.

Check out my video detailing this project 
from start to finish!


Special Day *Heartfelt Creations*

Be sure to check even more new inspiration at Heartfelt Creations!

Eventually, Claudia is gonna ban me from her blog... I'll be so sad. Once again, I followed one of her layouts. One of these days, I'll be a big girl and I will figure out how to work flowers all by myself! Until then... I used papers by K and Company.

This cluster is made from Posy Patch flowers and Bella Rose leafy swirl. I cut a variety of sizes in coordinating colors. The trim is from Stampin' Up.

The sentiment, fence and butterfly are all part of the new Garden Romance collection.

I only stamped and cut the Bella Rose leafy swirl thing once. 
I like to cut it apart and arrange the pieces to fit my project.

I just love this new stamp! I love romantic, shabby-chic-cottage-scenery stuff. I usually blend Prismacolor pencils with odorless mineral spirits, but I really liked the rustic look of the pencil here. So, I left the image unblended.

SUPPLIES:

OTHER:
K and Company. Archival black ink. Prismacolor pencils. Gems. Cuttlebug. Sewing machine. American Crafts. Bazzill. Stampin' Up. Gems.

INSTRUCTIONS:
1. Card is 6x6 inches. Choose three patterned papers.
2. Stamp the Brookside Manor image on cardstock and cut/emboss with largest, circular Spellbinders die. Color to match the patterned paper. Set aside.
3. Cut a 5.5x5.5" piece from patterned paper for the background. Cut a 2.75x5.25" piece for the vertical section. Cut 2.5" squares for the left and right sides of the card. Ink the edges of all four patterned paper pieces. Mat to coordinating cardstock and machine stitch.
4. Adhere the four patterned paper sections. Cut/emboss with largest, scalloped circle Spellbinders die. Attach to card front. Attach pink trim.. Use foam dots to attach the stamped image.
5. Stamp and cut Posy Patch Flowers on three colors of coordinating cardstock. Assemble in various sizes and attach to upper right of stamped image.
6. Stamp and cut Bella Rose Leaves on green paper. Cut the image apart and fill in floral arrangement. Finish flowers with gems.
7. Cut the fence piece from Garden Romance dies. Attach to lower left.
8. Stamp and cut a butterfly from green cardstock from Garden Romance dies. Attach to the fence.
9. Use Archival black ink to stamp "special day" on white cardstock. Cut a banner shape on the left end and layer on fence.

CARD BASE: Cut a 6x12 inch piece of thick, white cardstock. Score at 6 inches. Attach the card front to the base.

Sunday, June 17, 2012

Happy Father's Day

I just put in two long days working a scrapbooking convention (a totally good time!). I really missed my baby so we squeezed in a little walk together last night. As we were circling the block, we talked about how to celebrate Father's Day. Chance suggested lights and streamers. And cake. He was full of good ideas! So, we got up early this morning and put our heads together 
and decorated the kitchen in Daddy's honor. 
We were quite a team!


I used Plantin Schoolbook to cut the yellow scallops and red letters on the banner.


Chance always wants to help with my cards.

I love the steaming cup of coffee!


Man of the Day

Chocolate cake has been requested. We'll do that tonight.

I love my husband, but what is it with men and their hole-y t-shirts? We're not homeless...


And my own Daddy

I love you, Daddy!
Happy Father's Day! xoxo


Wednesday, June 13, 2012

On Your Wedding Day *Heartfelt Creations*

It's New Release Day at Heartfelt Creations! Be sure to visit the BLOG for more inspiration. 
Leave a comment on their blog and you could win the entire Garden Romance collection!

Brand new lovelies from Heartfelt Creations! The sentiment, soft floral background stamping, and butterflies are all new this month. The papers are from Everyday Poetry by Webster's Pages, available in the Scrap That! Life's Muse June Kit. I followed a sketch from The Sweetest Thing for inspiration.

This pretty lace from Scrap That! was white until I sprayed it with Glimmer Mist. Perfect!


I stamped the sentiments with Vintage Photo Distress Ink. I inked the edges with pink and brown distress inks. Then, I used stamps from Twining Roses with Versamark Dazzle and stamped the edges. I rubbed Pebbles shimmering chalks over the images. I finish with Diamond Stickles on the edges.

SUPPLIES:
HCPC Brookside Manor PreCut Set
HCPC Twining Roses PreCut Set
HCPC Add-on Sentiments PreCut Set
HCD 723 Garden Romance Die

OTHER:
Everyday Poetry by Webster's Pages. Diamond Stickles. Distress Ink. Archival black ink. Versamark Dazzle ink. Pebbles chalk. Sewing machine. Lace. Bazzill blue cardstock. American Crafts white cardstock. Glimmer mist. Glossy Accents.

INSTRUCTIONS:
1. Stamp "On Your Wedding Day" with brown Distress Ink on white cardstock. Cut with the sentiment on the right and space on the left. Ink the edges with brown and pink Distress Inks. Stamp twining roses with Versamark Dazzle around the edges. Rub with chalk for color. Cut a strip of subtle patterned paper to fit on the left of the stamped pieces. Stamp with twining roses in Versamark ink and rub with chalk for color. Ink the edges and attach to sentiment pieces. Mat to yellow-green cardstock and accent with Stickles. Set aside to dry.
2. Cut a 4 x 5.5 inch piece of patterned paper for the card front. Ink the edges. Cut a wide piece from the blue striped paper, ink the edges, and adhere to card front. Mat to blue cardstock and machine stitch.
3. Cut a piece of lace to fit on the top left. Glimmer mist. Set aside to dry.
4. Cut a few accent pieces to stick out on the left of the cut, from underneath sentiment piece. Adhere and layer on the sentiment piece.
5. Attach the lace with Glossy Accents.
6. Stamp and die cut three butterflies. Attach to the card as desired.
CARD BASE: Cut a 6 x 9 inch piece of thick, white cardstock. Score at 4.5 inches. Attach the card front to the base.