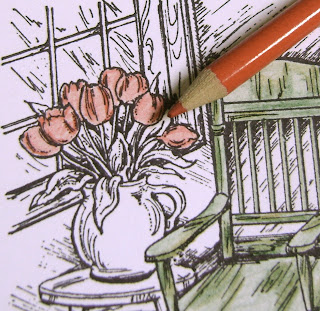
I saw this rocking chair stamp by Northwoods at Addicted to Rubber Stamps (now there's an understatement). The website was nice enough to let me know there was only one in stock so I snatched it up!
If you want to see a more simple tutorial for pencils, check out this earlier post by me. For those of you that choose to stay here, let's get complicated.
I have a small collection of Copics but have yet to master them. They're stashed away due to frustration for now. However, watching this tutorial for Copics changed my pencil technique and I highly recommend checking out. Coloring this stamp, I made it a point to add shading with unexpected colors (because of what I learned watching that video).
Plain white cardstock. Stamped with Archival black. Used a thin foamy packaging sheet under the cardstock for a good impression.
I decided to make the rocking chair green and laid down the lightest shade first, taking my time and coloring in little circles.
Middle shade of green, using the stamp itself for guidance.
Darkest shade.
Wasn't satisfied so I did another layer with the darkest shade.
Unexpected shade: orangey-yellow.
Plain old red.
Shaded with same red, laid down some pink for kicks.
Light green on the leaves.
Same green with heavier hand for shading.
Dark green.
Light blue for the vase.
Same blue for shading, added grey for more dimension.
Used the same four colors from the rocking chair to make the table match.
Two shades of yellow for these flowers.
Dark yellow and brown for the planter.
Now, there is a fuzzy picture but there is some stray blue in the upper right.
I erased it with a plain old piece of Scotch tape. I used this technique several times coloring this stamp.
Blue and grey for the windows.
White, grey, and brown for the trim.
Two shades of yellow for the house/background. I used the darker yellow to outline a shadow for the flower arrangements, chair, table etc.
Brown for the floor, one color.
Can't wait to put this on a card!


4 comments:
WONDERFUL instructions, Alissa! Love how you photographed the pencils at each stage! THANKS for the www site when you visited my blog today! xx
Alissa...your coloring is gorgeous!! You sure have the blending and shading down to an art!! Thanks for all the pics and tips!
Beautiful tutorial.. The name of your blog is too funny..I will do anything for stamps too...even run.. LOL
Hugs,
LIM
I'm going to have to try this sometime! I've ALWAYS been intimidated by coloring stamps so I've never tried it but always wanted to. This definitely gives me the guide and knowledge to try it =] TFS!
Post a Comment