Feast your eyes on this cutie!
Yes, he's mine :) Cooked him up myself. Chance is about 18 months old in this photo. We bought him his first pair of Vans and he was SOOO proud of his cool new shoes. I have always loved this picture and I've scrapped it twice before. I just felt like the previous LOs never did this photo justice. We'll see how this newest LO holds up. I used flash to take this picture so there's a little glare. I kept trying without flash and editing the lighting/color in iPhoto but it just wasn't working out.
My inspiration began with Marthasdaughter at scrapbook.com. You can see her LO here. I designed the circle with my Gypsy and cut with my Expression. The pp is from Little Boy by Echo Park. The bg paper is from Nook and Pantry by Basic Grey. The title is a rub on from Basic Grey. The cardstock stickers, fabric brad, and paper whimsies are from Sassafras. Flowers by Prima and Sassafras. The googly eyed sparkly alien is American Crafts. The bingo card is by Jenni Bowlin. The small scalloped die cut is from Spring Fling by Making Memories. The little arrow rub on is by Paper Studios from Hobby Lobby. The little cardstock sticker by October Afternoon, to the left of the photo, says "look at me."
I found some more pictures that I took of using rub ons. Once again, I don't usually cut out my rub on, just adjust the backing to protect my work surface.
This blog features papercrafting projects including scrapbooking, cardmaking, altered art, stamping, and gift ideas.
Sunday, December 19, 2010
Saturday, December 18, 2010
Masking and Misting Tutorial, Card Update
If you shy away from glimmer mist because of the messy splotches, try it anyway and coach yourself into embracing the splotch :)
I started with this sketch for inspiration. Love her sketches! I picked a mask and secured with my handy magnets. Repositionable adhesive (picture left) actually does better but I skipped it this time.
Shake and spray. Some people have theories that admonish shaking and encourage swirling. All I have to say about that: Whatever. If the sprayer stops working, take off the cap off sprayer and rinse in running water. Works like a charm. Anyway, I use a paper towel to dab excess. You can choose to use a heat gun for faster drying. I did.
Dry and ready. Some of the mist leaked under the mask. This occurs less often when I use repositionable adhesive but for this LO it doesn't matter.
Quick rub on tip (because I love rub ons): You do not have to cut your design out of the sheet. This is a hassle especially when the rub ons are close together. Reposition the backing sheet to protect your surface from rub ons that you don't want to use. Here, the backing is still under the "A."
You can see where I've used the rub ons on the right and didn't have to cut anything. I also like how this keeps my rub on sheets nice and neat.
Finished LO. The papers are from Grandma's Kitchen by WRMK. Various rub ons by Daisy D's and Pink Paislee. Doodling with a micron pen. Clear floral stickers by American Crafts. Cardstock stickers from Rusted Sun by Fancy Pants. Purple brads by MM.
Update on my recent card. Added some stickles!
I started with this sketch for inspiration. Love her sketches! I picked a mask and secured with my handy magnets. Repositionable adhesive (picture left) actually does better but I skipped it this time.
Shake and spray. Some people have theories that admonish shaking and encourage swirling. All I have to say about that: Whatever. If the sprayer stops working, take off the cap off sprayer and rinse in running water. Works like a charm. Anyway, I use a paper towel to dab excess. You can choose to use a heat gun for faster drying. I did.
Dry and ready. Some of the mist leaked under the mask. This occurs less often when I use repositionable adhesive but for this LO it doesn't matter.
Quick rub on tip (because I love rub ons): You do not have to cut your design out of the sheet. This is a hassle especially when the rub ons are close together. Reposition the backing sheet to protect your surface from rub ons that you don't want to use. Here, the backing is still under the "A."
You can see where I've used the rub ons on the right and didn't have to cut anything. I also like how this keeps my rub on sheets nice and neat.
Finished LO. The papers are from Grandma's Kitchen by WRMK. Various rub ons by Daisy D's and Pink Paislee. Doodling with a micron pen. Clear floral stickers by American Crafts. Cardstock stickers from Rusted Sun by Fancy Pants. Purple brads by MM.
Update on my recent card. Added some stickles!
Friday, December 17, 2010
Make a Bow Tutorial
I made this card tonight. You can see the process for coloring with pencils here. The colors in the photos are a tad wonky but that's what I get for taking pictures at night!
The stamp is by Inkadinkado, stamped with Archival black, and colored with pencils. The patterned paper is by K and Company, distressed with Heidi Swapp distess tool ($2). I used a Whispers brand dark green marker and ruler to draw the lines. The trim is American Crafts. The charm and bamboo charm are from the jewelry section at Michael's. LOVE bamboo twine, not furry like regular twine.
I like to use a magnet to help me make my bows. I use a Basic Grey Magnetic Cutting Mat. Don't have a magnet? Try using a piece of Scotch tape or put a little repositionable adhesive under the ribbon where the magnet would be.
Pull a piece of trim and place magnet about 6 inches in. Whatever makes you comfortable. You'll need less to work with as you get better.
Being right-handed, I start by making a loop on the right.
Add the second loop on the left, just like tying a shoe. That magnet simply acts like a finger.
Pull securely. Looks dumb? That's okay.
Remove the magnet.
Adjust by pull the loops and tails until you like it.
Cut tails to desirable length.
I like to use a magnet to help me make my bows. I use a Basic Grey Magnetic Cutting Mat. Don't have a magnet? Try using a piece of Scotch tape or put a little repositionable adhesive under the ribbon where the magnet would be.
Pull a piece of trim and place magnet about 6 inches in. Whatever makes you comfortable. You'll need less to work with as you get better.
Being right-handed, I start by making a loop on the right.
Add the second loop on the left, just like tying a shoe. That magnet simply acts like a finger.
Pull securely. Looks dumb? That's okay.
Remove the magnet.
Adjust by pull the loops and tails until you like it.
Cut tails to desirable length.
Monday, December 13, 2010
Page 11
The missing page 11 from Nathan's album. Got the whole thing shipped today and I just can't wait to hear him giggle over it!
Nathan and I loved to give each other cards for any and all reasons. I have kept a few. I took pictures of the cards I have and edited them in iPhoto for size. The pp are from Sassafras and Tim Holtz's Lost and Found. That gorgeous flower is by Stephanie. The smaller ones are Prima. The brad is 7 Gypsies. The pointer finger is a stamp by Sassafras, stamped on white cardstock and glimmer misted red. The journaling tags held by the binder clip are MME. This LO was inspired by Tracyfish.
Sunday, December 12, 2010
Color with Pencils
I must be feeling frisky today! Two posts in one day!
I was actually counting down to bedtime when I pulled out this very frustrating Inkadinkado stamp. I have worked with it before but felt the results were mediocre. It was these two cards that I started to realize my coloring/shading isn't aggressive enough.
I ended up with this tonight and then thought I should demonstrate the progress.
To do the fountain, I chose three shades of green.
I laid down the lightest shade. You can probably barely see it here. TIP: I recently discovered that it is better to color in a circular motion. I've noticed a much smoother texture with my pencils when I started to doing this.
Here, I added my middle shade using the shading in the image as a guide.
Added my darkest shade of green and just kept playing with it a little here and there until I liked it. This picture is rather washed out or overexposed or something. The next pictures are better.

Colored the birds and water. I will probably add a little stickles for sparkle later.
I feel better about this stamp and it is officially rescued from the sale pile.

Another recent example with colored pencils. I like the way this turned out but I do plan to do it again with even more shading and experimenting with color.
I was actually counting down to bedtime when I pulled out this very frustrating Inkadinkado stamp. I have worked with it before but felt the results were mediocre. It was these two cards that I started to realize my coloring/shading isn't aggressive enough.
To do the fountain, I chose three shades of green.
I laid down the lightest shade. You can probably barely see it here. TIP: I recently discovered that it is better to color in a circular motion. I've noticed a much smoother texture with my pencils when I started to doing this.
Colored the birds and water. I will probably add a little stickles for sparkle later.
Another recent example with colored pencils. I like the way this turned out but I do plan to do it again with even more shading and experimenting with color.
Stamping with Markers and Coloring with Chalk Tutorial
Not sure what to do with those markers and chalks? Wanna get more mileage out of them? Get a simple stamp (or complicated if you have a wild hair) and follow along!
I have two sets of chalk I like to use. The Pebbles on the left are soft and sparkly. The decorating chalks on the right are richly pigmented and both have a great palette of color. I also like to use Fantastix for coloring. Make up applicators and quality cotton swabs would work. I like the Fantastix because I can sand the tips, making the stick usable with another color. I chose and Christmas-y red and green marker to use with my simple holly berries stamp. Both of the markers are Whispers brand. I've had them for several years (thank you, ebay) and they still work wonderfully. I also have Marvy and Tombow brand markers that work well for this technique. It is important to use markers with a brush tip. I usually stamp on white cardstock, nothing special.
Color the stamp with the brush tip of the marker. Here I'm working with green.
Here is my stamp all colored with red and green. These markers are good about staying wet on the stamp but you can give your stamp a good, hot huff of air for good luck.
And here is the result on paper.
Dab the applicator on desirable chalk color.
Apply just like a crayon. Experiment with varying pressure for shading.
Just for example's sake, I applied even color to the top leaf and played with shading on the bottom leaf. I also have stray chalk outside the lines! No biggie.
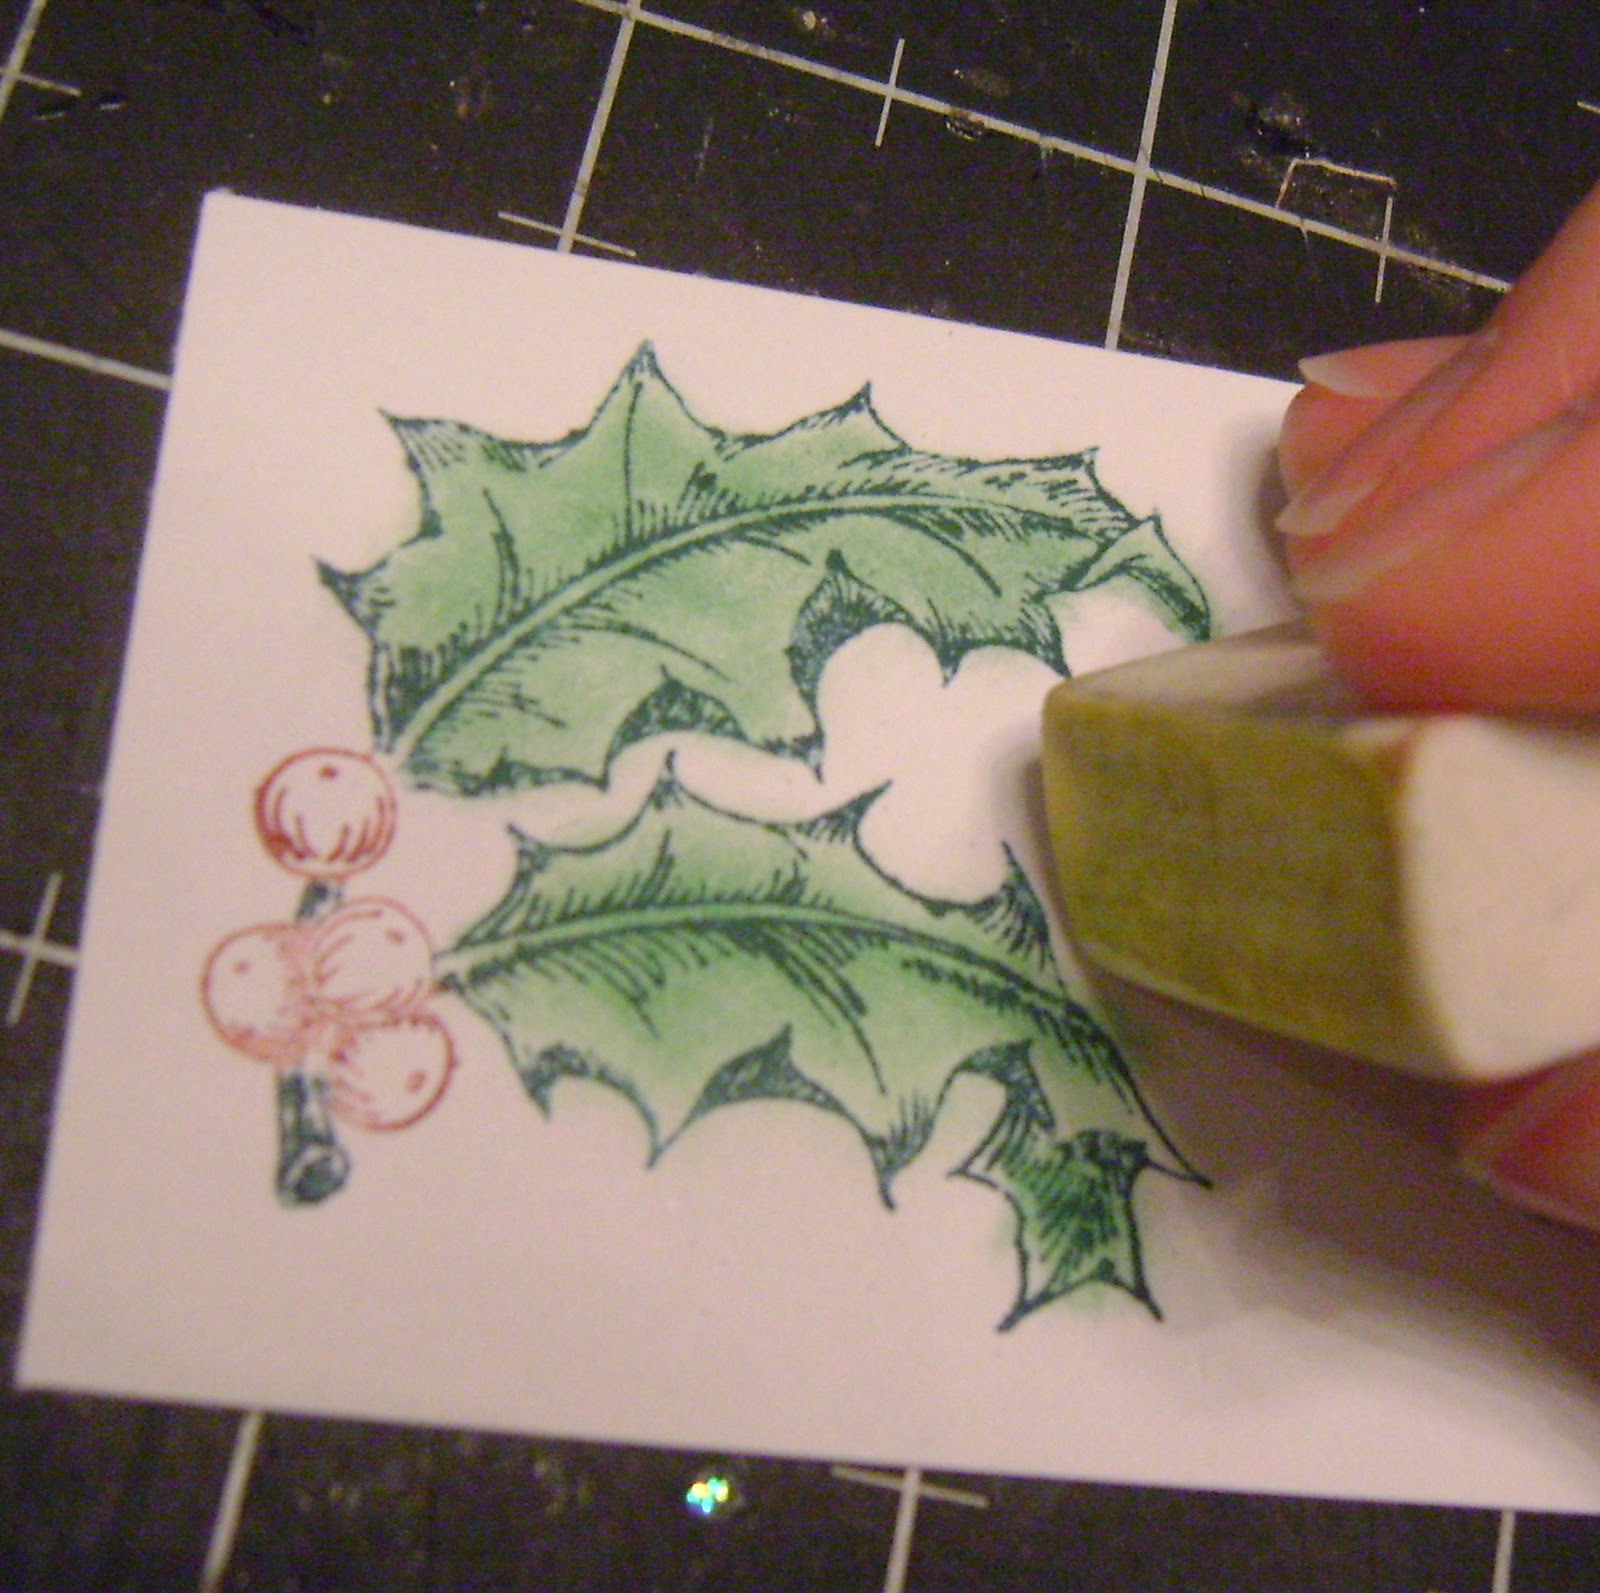
I used my chalk away eraser to clean up the image. You can also use the eraser to vary shading.
I cut my stamped image into a simple square and matted on a Spellbinder embossed piece. The bling is Stephanie brand bling. I used CarlaBaz's card for inspiration. Her can visit her blog here. The ribbon is random from my stash and the papers are My Mind's Eye. Green cardstock is AC.
I topped my stamped image with glossy accents. The berries have a touch of red stickles.
I love stick pins and brads!
Another example of stamping with markers and coloring with chalk. I did this one for Mother's Day 2009.
I did this one last year.
This one is stamped with Stazon brown and colored with chalk. This card was inspired by BadSherry. I hope she checks in and shares her blog address! She is SOOOOOO talented! You can see more about how I did this card here.
Subscribe to:
Posts (Atom)