Pages

Showing posts with label gypsy. Show all posts

Tuesday, October 25, 2011

Pocket Card- Halloween Invitation *Flying Unicorn*

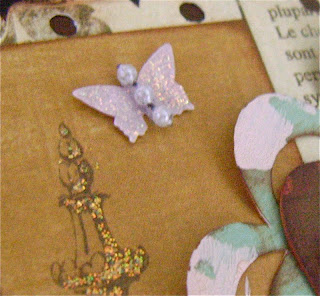
This is one of my Halloween party invitations this year. It is a pocket and I followed a tutorial that I found at SCS. I also love this one by knightrone. Papers from Apothecary Emporium by Echo Park, available at Flying Unicorn. The bat is a rub on by Creative Imaginations.

I cut both of these pieces with their decorative borders from the Gypsy/Cricut Expression, Storybook and Plantin Schoolbook. The crackle is Crackle Accents.

Sticker by K and Co. Trim by Daisy D's. Gems by Darice.

Just a fun, dimensional view.

The pull-out tag. The invitation stamp is by Recollections.

And Three More.


Monday, August 29, 2011

Whimsy Inspirations Magazine Issue No. 2 (Reminder)

Have you checked out the magazine yet? So many great creations to see!

My Contribution: Altered CD Case

Anne altered a CD cover into a card and I definitely wanted to try something similar. While I was thinking about how I wanted to do mine, I decided to make it a mini album. 


Papers from Gabrielle by BoBunny.

This embellished square is by Raindrop Echo Designs for Whimsy Stamps. I used shimmering chalks by Pebbles Inc for color and cut out.

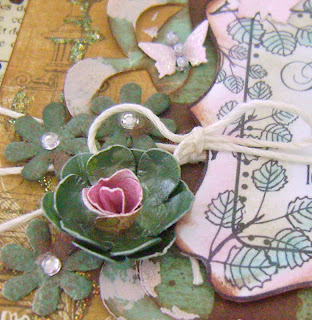
Butterfly punch by Fiskars, topped with pearls and stickles.

Lotus-lookin' flower by Stephanie. Gemmed flowers are Petaloo and sprayed with glimmer mist.


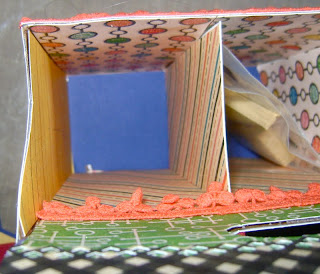
Inside view, standing.

Inside view, laying flat.

Printed the blank embellished square and filled with a rub on sentiment by Fancy Pants.

Pleated trim by Pink Paislee.

Die cut from Storybook, topped with glimmer mist.

My favorite corner punch. This corner is foam dotted to allow room for photos.

Just a row of sparkly gems.

The back.

Thanks for stopping by!

Saturday, August 20, 2011

Enchanting Creations Magazine- sisters


Check out my die cut tutorial in the Enchanting Creations Magazine! I'll show you how to cut chipboard with the Expression and some tips for dressing up die cuts.

I used my fun chipboard piece on this LO.
A photo of me and my sister the xmas before we were expecting our boys. Papers from the Butterfly Collection by Pink Paislee, available at Flying Unicorn. Based on a sketch by Alda. She has great sketches!

Stamp by The Girls Paperie, embossed and cut out. I believe the chipboard piece is by Dusty Attic. Painted with a white dabber, glimmer misted, and then stamped, Inkadinkado.

Die cut by Spellbinders, topped with glittery embossing powder. Brads by Creative Imaginations, I think. Stamp by Stampendous.

The flower on the left is a Stephanie flower. The wrinkly flower in the upper right was made by my sister (yep, in the photo). The hydrangea is Prima and the little rose is from Flying Unicorn.

The flower on the left is by my sister and the flower on the right is by Stephanie.

I bought these metallic looking frames (actually plastic) on ebay and cut ovals with my Gypsy/Expression to fit. The rose stamp is by CTMH. I colored a bit with chalk, sprayed with glimmer mist and topped with crackle accents.

Another flower by my sister Vivian! The dress form stamp is by The Girls Paperie and the goddess was fussycut from the Pink Paislee paper.

Rub ons by Fancy Pants.

The Chandelier is a rub on by 7Gypsies and the lace stamp is by Technique Tuesday.

Don't forget to check out the magazine for tons of great inspiration!


AND


Wanna win this?
Click here to find out how!


Thursday, August 18, 2011

For Chance's Teacher

My little guy is going with me to Kindergarten this year! I teach music and his classroom teacher is a DOLL! So, I made a few things for her to show my appreciation.

Okay, I'm gonna admit that I will be just a little sad when I give this away! The box is a Smirnoff carrier. The papers are from Hittin' the Books by DCWV. It took a couple of hours to cover this in paper so I kept the embellishments simple. For adhesives: mod podge, scotch quick dry, glossy accents. I filled the pockets with die cuts, erasers (in the frappuccino bottle), pens, and pencils.

I lined every bit of this carrier. It was very strong, sturdy by the time I was done with it. I used Glossy Accents to attach the trim. I used mod podge to attach some of the paper but found that I preferred Scotch Quick Dry.


Decorative border is from MS punch.

The vintage cards were cut from paper in the DCWV stack.

HELPFUL HINTS:
I've altered frappuccino carriers before. This time, I measured my paper and then attached. In the awkward spots, I attached a piece of paper and used a pencil to trace lines where I needed to cut by hand. This worked out very well! To cut the hole for the handle: cut the paper fit, attach with repositionable adhesive, use the hole as a template to draw the oval on the back of the paper. Remove the paper, pick a spot to cut straight through to the hole (no one will notice in the end) and cut along the line. 

Clear as mud? If anything is ever unclear on my blog, you can check the box "show me a tutorial" at the end of the post :) This is especially great if you don't have time to leave a comment or blogger is being difficult.

More die cuts.
Some die cuts for her bulletin board. I used my 12x24 mat and cardstock so these cuts are rather large. I get my 12x24 Bazzill cardstock from Oh My Crafts! Also notice the 12x12 packs. They're a great price, great variety, and it's a LOT of paper! I've got one of the blue packs last year and I don't think I'm ever going to run out.

Volunteering die cuts are a great way to help your favorite teachers!

Saturday, July 23, 2011

Adorable

Been inspired by the baby pictures lately.

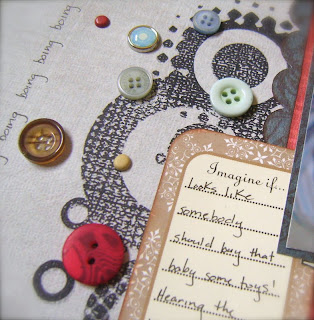
A blurry photo but I wanted to scrap it anyway! Here he his playing with the door stop: boing boing BOING! Somebody give that kid some toys LOL Followed a sketch by pagemaps. Papers by Fancy Pants.

The monogram is a rub on by Daisy D's.  Too bad they're no longer in business because they made some of the best rub ons ever! The boing-y spiral is from Picturesque, Gypsy/Expresison. It is topped with crackle accents and outlined with a micron pen. The sentiment is a rub on by Fancy Pants.

The circles are a stamp by Fancy Pants. The journaling tag is by Colorbok.

Fiskars border punch leftovers topped with fun stickers.

"boing" for the border instead of stitching. Decorative border from Plantin Schoolbook, Gypsy/Expression.

Thursday, July 21, 2011

Happy Birthday, Mom!

WOW! I've been away for two weeks visiting my family. Thankfully, I did have a couple of scheduled posts. I got five LOs and two cards done while I was away. My mom and sister are both scrappers. Lucky me!

Various papers from my Mom's stash. I do know that the purple bg paper is from Lilac House by Fancy Pants. Border punches by MS and Recollections.

Digi by Meljen's for Whimsy Stamps. Colored with Loew-Cornell pencils and topped with purple gems.

Sentiment by MSE. Ribbon from my mom's stash. Cut the circles from Plantin Schoolbook, Gypsy/Expression.

Sunday, July 3, 2011

Overdone Fairy Card and Time Well Spent (D2T)

(Scroll down for CC Blog Hop.)


My inspiration began with Get Well Soon by Claudia. Papers from Phresh and Phunky by BG. Scored the whole pack at a yard sale last year for $5 and wish I had more! Yay for impulse buys.

It always takes me forever to arrange flowers. I finally got my greatest inspiration when I noticed a speck of a goldfish snack stained my fairy. Solution: Add more flowers! Perfect!

Went a little nuts with the flowers, butterflies, stick pins, brads, glimmer mist, stickles, and gems. Also known as "a good time." The blue flower on the right is by Stephanie. The butterflies are from a Fiskars punch and topped with stickles and gems. Ribbon by American Crafts.

Yes, you have definitely seen this digi on my blog before. She is from Digital 2 for Tuesday, one of my favorite digi sites ever. I colored her with Loew-Cornell pencils and she is topped with shimmer chalk and rubbed a bit with stickles. I've also noticed a trend of a bit on stickles on the edge of the stamping mat. Tried it here and I definitely like it.

A Fiskars corner punch. Cut out and inked up. I got this punch from the clearance section at Ms awhile back. More yay for impulse buys.

A fun dimensional view. Die cuts from Storybook, most favorite cart ever.

Overdone Fairy Card Procedure
Day 1: Print and color fairy.
Day 2: Choose LO/inspiration, design die cuts and choose pp.
Day 3: Die cut and arrange. Stitch.
Day 4: Choose ribbon, stress over flower arrangement. Finally get it right because you dropped a goldfish on your project.
Day 5: Glue. With at least 3 different types of glue.
Day 6: Cut card base, line the inside, and adhere the front. Add stick pins just because.

Seriously.

More D2T. Time Well Spent.

The LO for this card was inspired by Karen. Love her work! Papers by BG.

A Studio G sentiment.

Digi by D2T. Colored with pastel pencils.

Papers from Origins by BG.

Another digi from D2T. Stamped image cut with Spellbinders and set with foam dots. Colored with Loew-Cornell pencils. Blue sky is chalk.


Thanks for stopping by!